|
Items in Cart: 0, Total $0.00 |
|
|
CategoriesImportant LinksManufacturersContentInformationPaypal Verified Seller
|
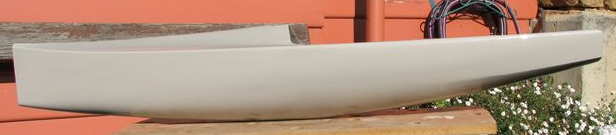
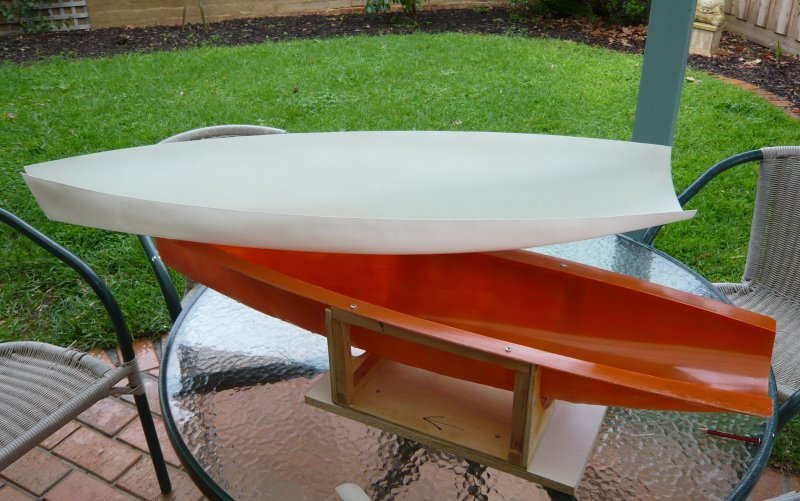
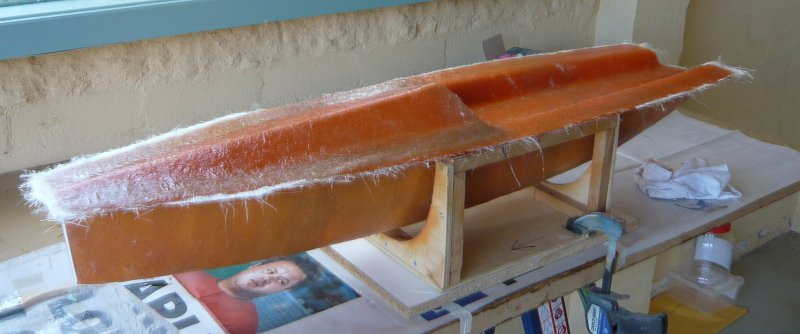
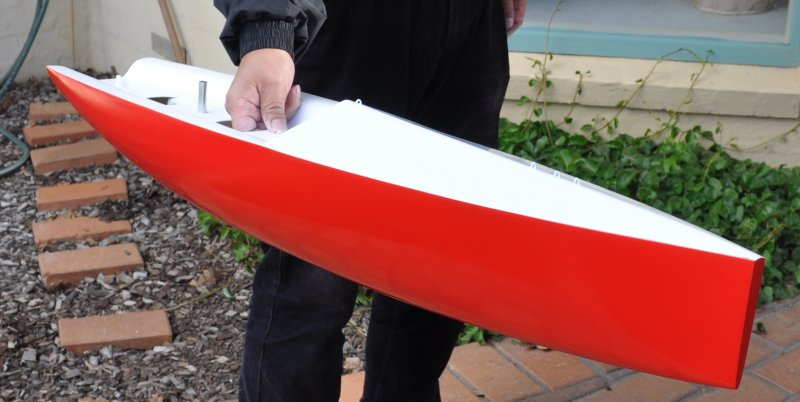
Building an IOMSee our Photo Gallery for new rc sailing builds and boats - click here Interesting detailed photos of a Pikanto from Lester Gilbert - Click Here Building a PIKANTO (hybrid) from a Bare Hull - May 2010 I acquired a bare Pikanto hull from SAILSetc earlier this year and commenced building it this week. The hull is laid up in a mould in 2 halves and joined together down the centre line, unlike most radio controlled yachts, which have a hull and deck moulding, and are joined at the gunwales To make life interesting, I have decided to build my radio controlled yacht with our Ultralite Carbon Fin (UFIOM) with a Mad Max Bulb (MMB) and a Craig Smith Rudder (CR1). Craig was very generous in providing information on a Pikanto build he did recently for Dallas Duesen, and I am going to use the conventional sheeting system that Craig uses on the TS2 and Obsession rc yacht. The boat will be fitted with an RMG 280 ES Winch and our Rig Kits, using 10.8 mm High Tensile Masts.
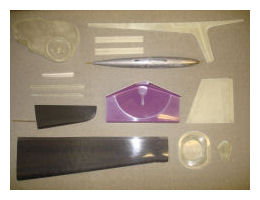
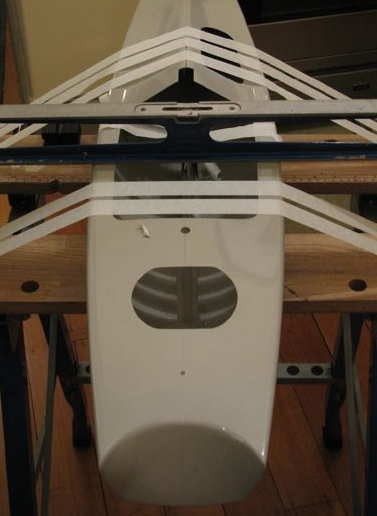
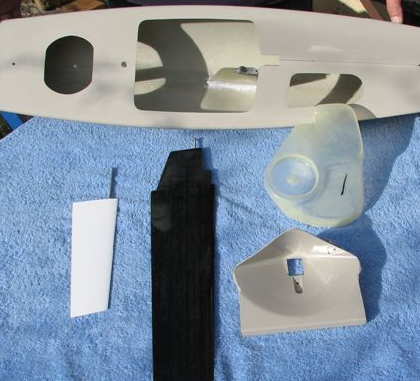
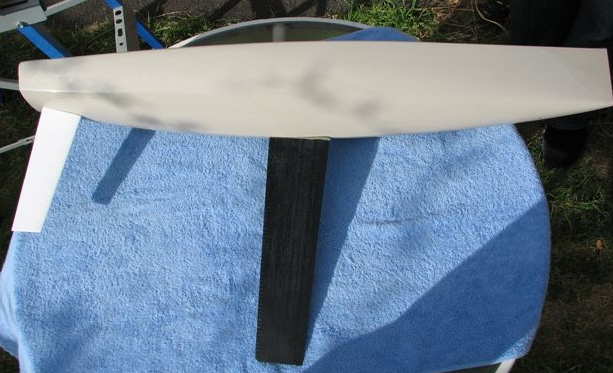
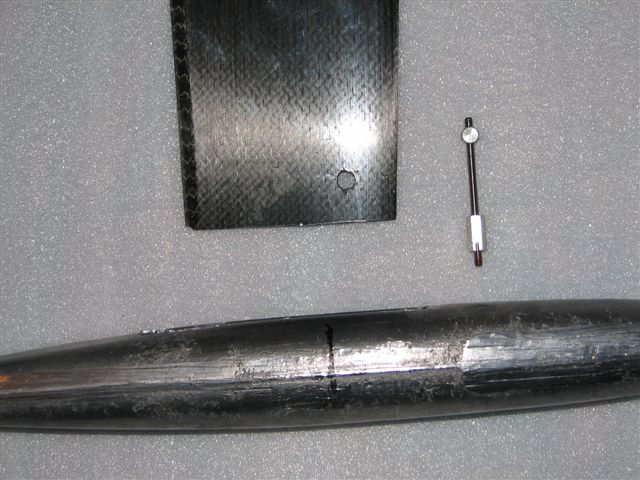
May 1st 2010 - Below is the range of parts which will be required to be fitted to the bare hull, including the moulding that is used to join the two halves of the foredeck along the centreline. This moulding also incorporates a 6 mm ID tube that is bonded to the bottom of the hull, to run a dyneema line from the bottom of the tube to provide a swivel for the No 1 headsail. - Just aft of that tube is a recess which allows the attachment points for the No 2 and No 3 headsail swivels (ball raced version 120d) to be placed low down so the headsail boom is close to the deck. The depth of the main girder provides great stiffness and helps resist large rigging loads.
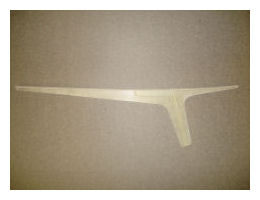
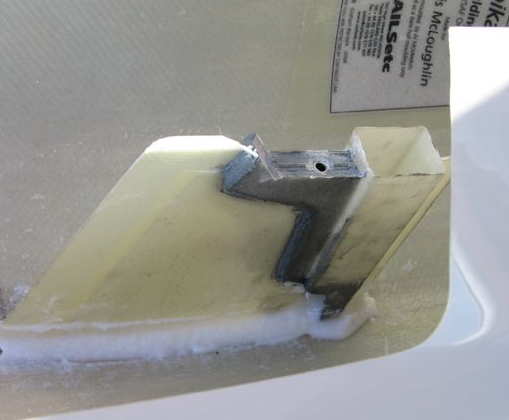
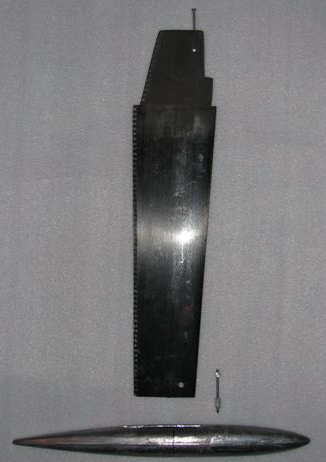
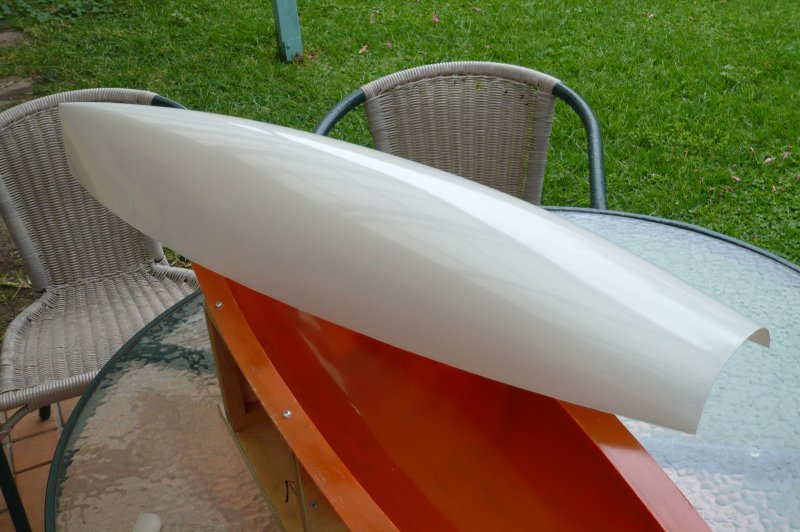
After determining the final position of the fin and grafting a mast box onto the Ultralite fin case (UFC), it was time to get the Dremel out and carve a hole in the bottom of the boat, the exact shape of the fin case (which for extra strength I have fitted to project through the hole) whilst making sure it is perfectly in line with the centreline of the hull. Fortunateley this all went well and everything fits and lines up perfectly.
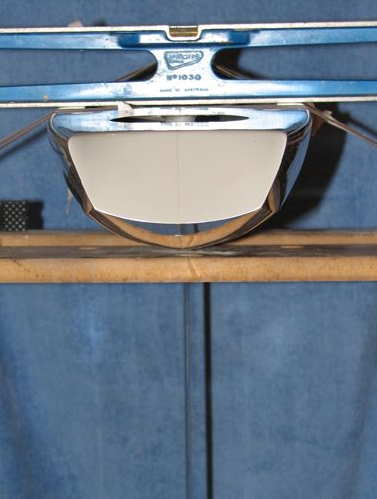
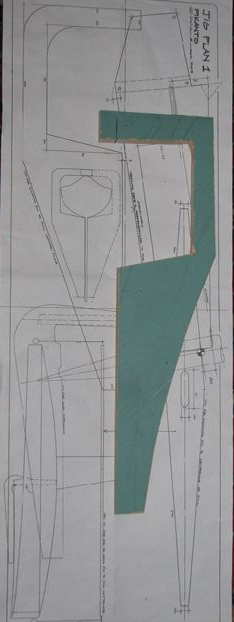
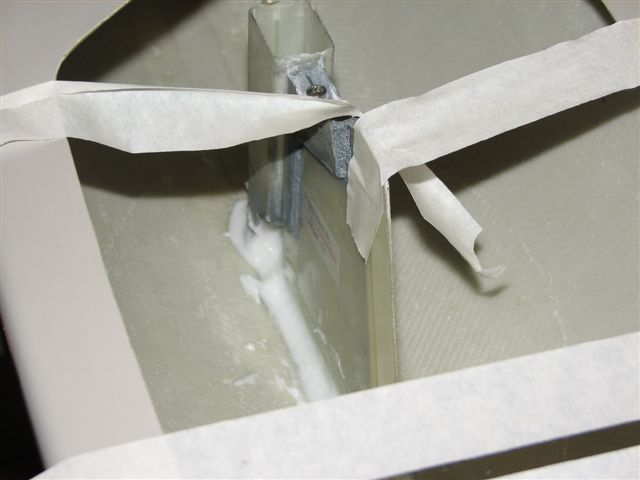
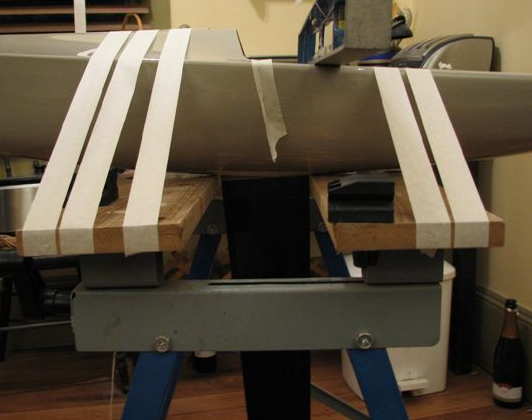
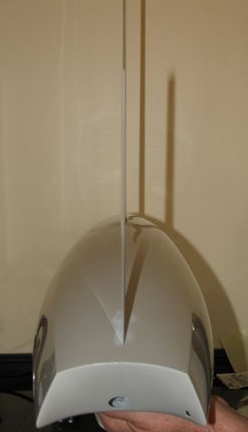
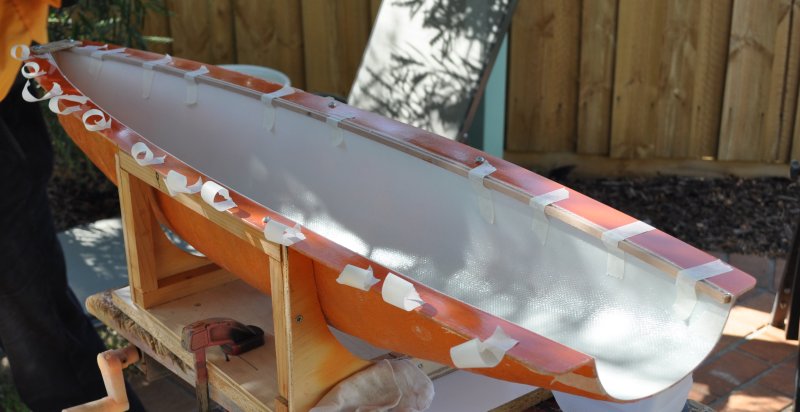
Now for the most critical part of the operation - Glueing the fin case in position. Using a jig plan from SAILSetc. I made a jig that fits around the hull to ensure the fin is perpendicular to the hull when viewed from the bow. At the same time the trailing edge of the fin has to be positioned, so it is perpendicular to the waterline of the hull when viewed from the side. This all has to be achieved, whilst ensuring the fin is perfectly in line with the centreline of the hull - A tricky operation, but hopefully the photos will give a few clues.
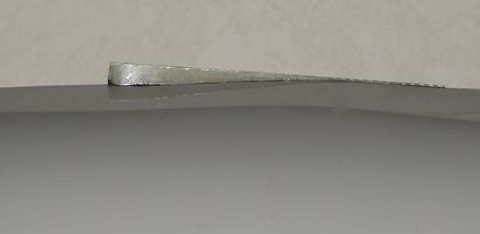
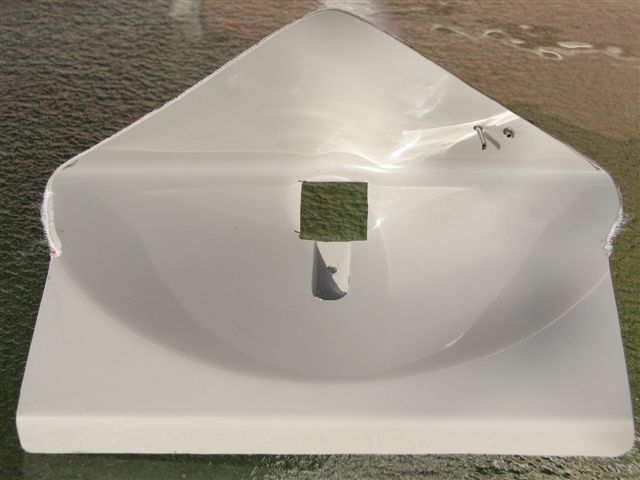
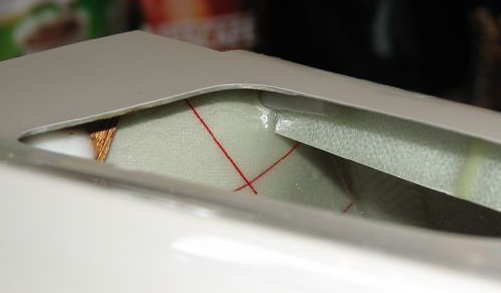
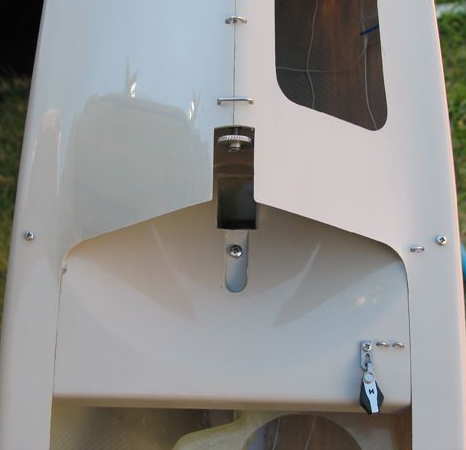
After fitting the fin case, it is time to prepare the deck/bulkhead moulding. The moulding is carefully trimmed to fit into position, the mast tube entry is cut out and because I am fitting an above deck sheeting system, I have bent some small diameter stainless steel tubing, and fitted them to the bulkhead, to run the sheeting lines from the under deck winch, to a Hales Deck Block (DMB-1), mounted on the deck near the stern. To prevent the tube flattening when bending, insert a wire into the tubing before bending.
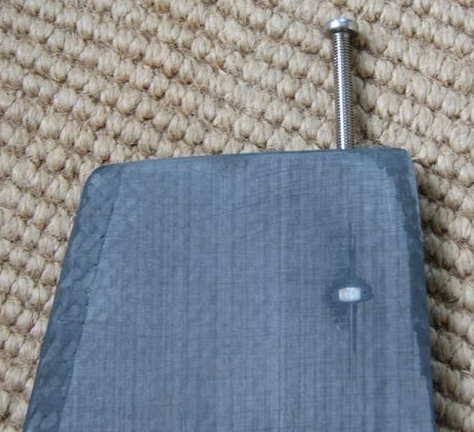
Fit the fin attachment by using a Fin Insert (INS-040) or you can epoxy a 3 mm nut into a slot in the head of the fin, and locate a 3 mm bolt into it. Alternatively, you can glue the bolt into position and cut off the head, and use a 3 mm nut and washer to attach the fin to the hull.
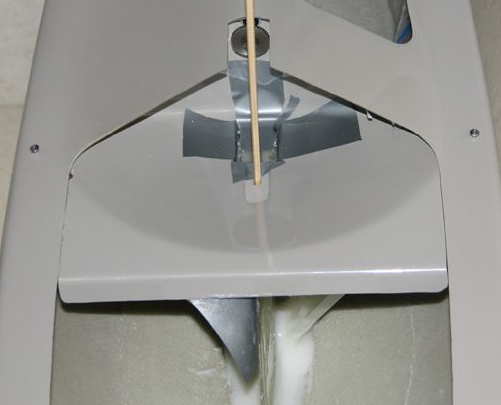
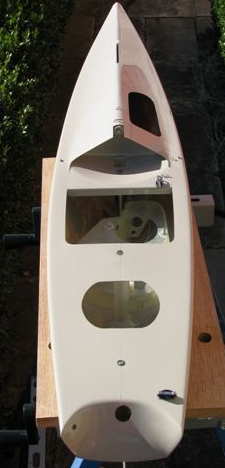
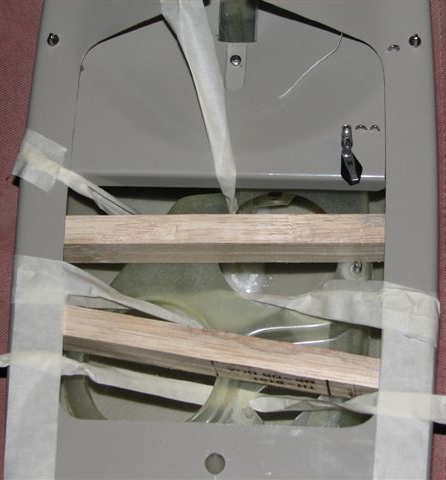
With the fin and rudder fitted, it is time to prepare the winch/pot/servo tray moulding and the diagonal bracing for fitting to the hull, before the deck/bulkhead moulding is glued into position.
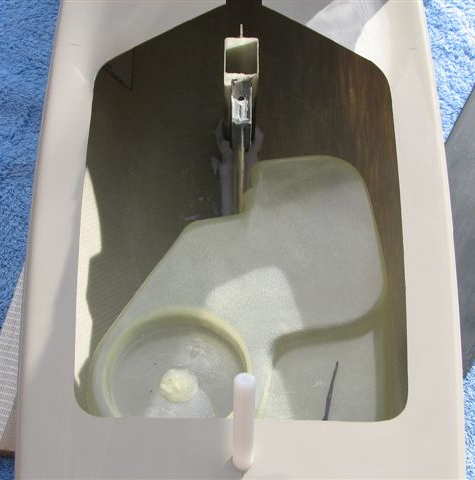
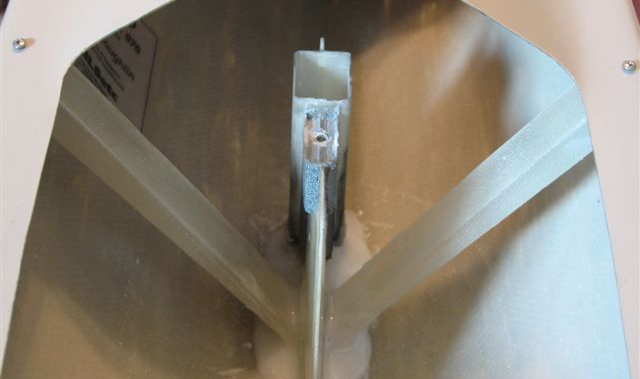
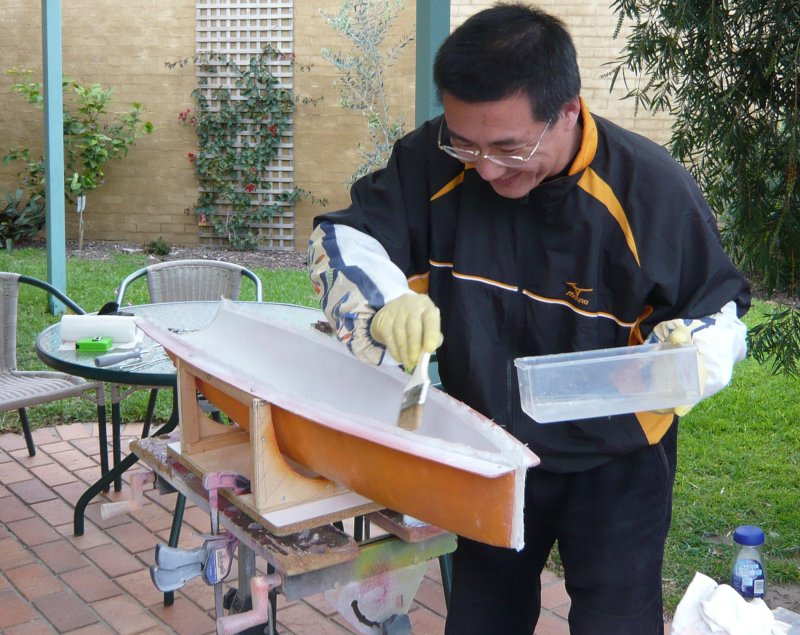
May 7th 2010 - We have had a busy week at Radio Sailing Shop, filling orders etc, but managed a few jobs on the build. With the deck/bulkhead glued in place, it is time to use the epoxy glue/filler mix to join the fin case/mast box to the deck, with a good bead of the paste run along the join inside the boat - Using fingers is the best way to put this in awkward spots, being very careful not to leave finger marks on the hull. Luckily Cassie held the boat whilst I did this messy job, but covering the hull with cling wrap could also be a good idea. As this hull comes with a finished gelcoat, and won't be painted after the build, great care has to be taken to avoid scratches, epoxy fingermarks and general damage during the build. The mast ram is installed during this process and a bamboo skewer was inserted where the fin bolt will go to stop epoxy getting into the fin case and to keep hole clear - remove before epoxy sets. The epoxy filler mix is made by mixing clear epoxy resin (West System) then adding about a half West System 403 microfibre blend and half epoxy glue powder until you have a thick paste. You can smooth the paste by letting it set for a while, then dip your finger in detergent and run it along fillet.
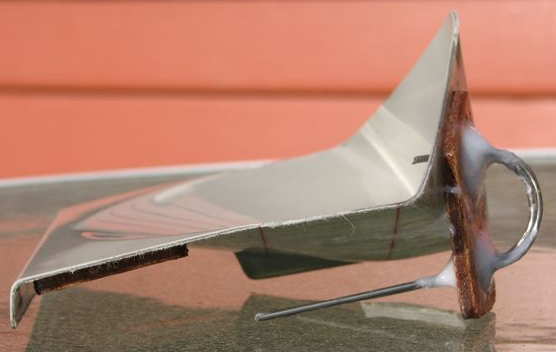
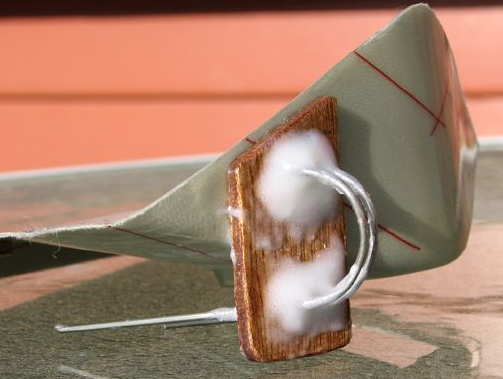
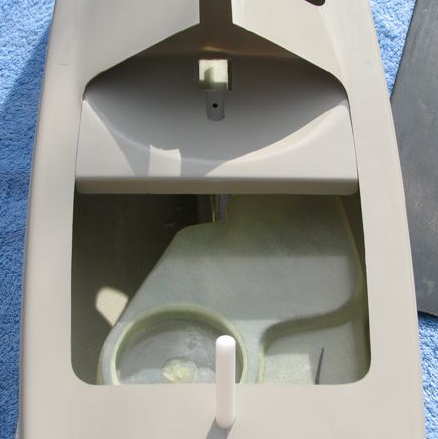
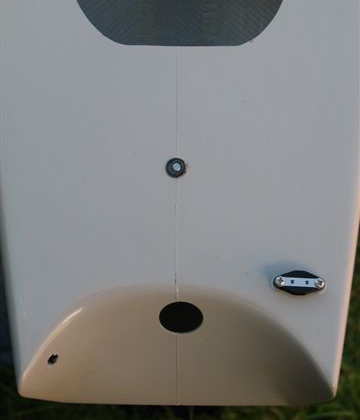
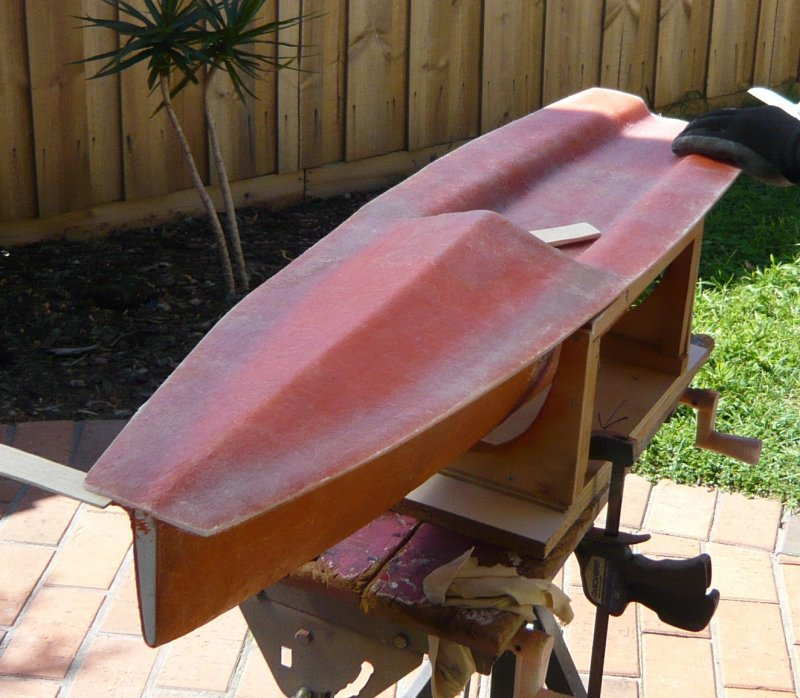
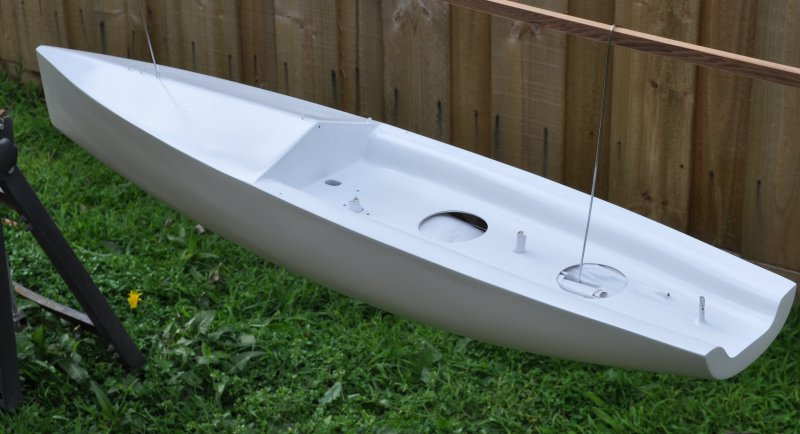
12th May 2010 - The deck fittings have been fitted and the drain hole and rudder arm access holes have been drilled. Wire hoops etc are epoxied from under the deck to make them secure and waterproof. The top bearing for the rudder, which had to be fabricated to fit the angle of the shaft, has been glued into its final position, ensuring the rudder lines up with the keel fin.
The rudder must be fitted to match the hull and to line up perfectly with the fin - whilst most rudders are usually fitted with the shaft in the vertical position, I have fitted the shaft to be approx. 90 degrees to the hull (in the style of the Obsession IOM) - This allows the rudder to fit closley to the hull, and not bind against the hull when turned, and it is thought the sweeping motion also gives you the same turning moment with less rudder throw, thereby reducing drag in turns. Care has to be taken when fitting the rudder like this, to make sure it dosn't project past the transom.
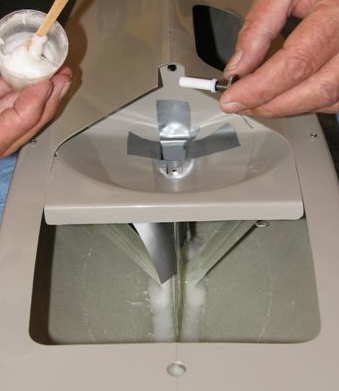
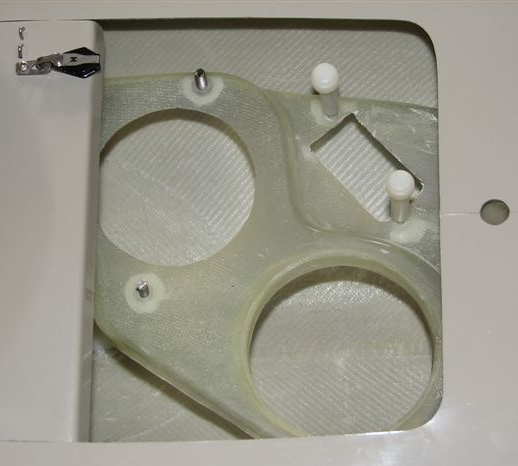
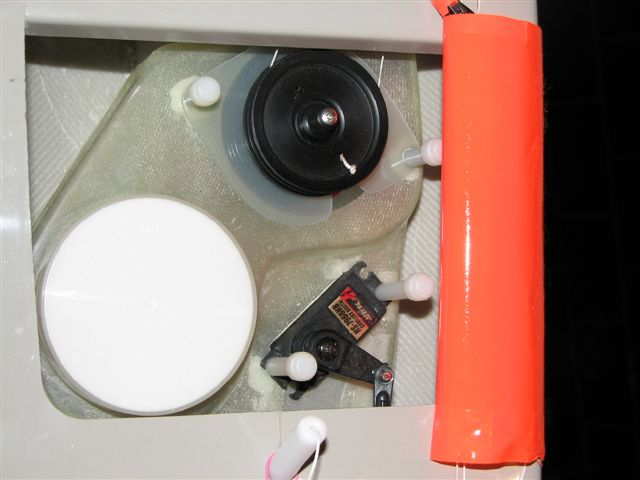
The winch/servo tray has its cutouts done, and quick fit mounting bolts glued into position, and is then fitted to the hull by using 30 mm deep spacers under the deck, to keep the tray parallel with the deck. It is then glued in place, to the back end of the fin case and the front end of the main post tube.
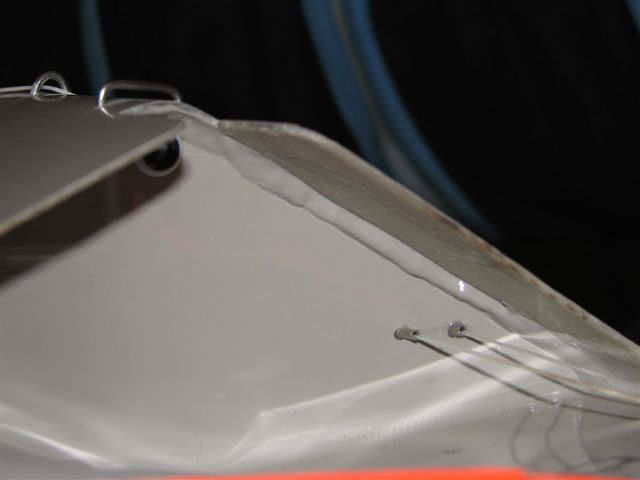
The A Rig jib connects to a ring on a line led through a fairlead installed in the tube, and the B & C Rig attach to wires in the slot in the deck using ball raced jib boom swivels.
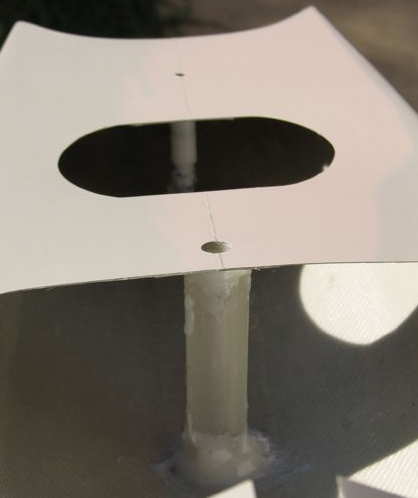
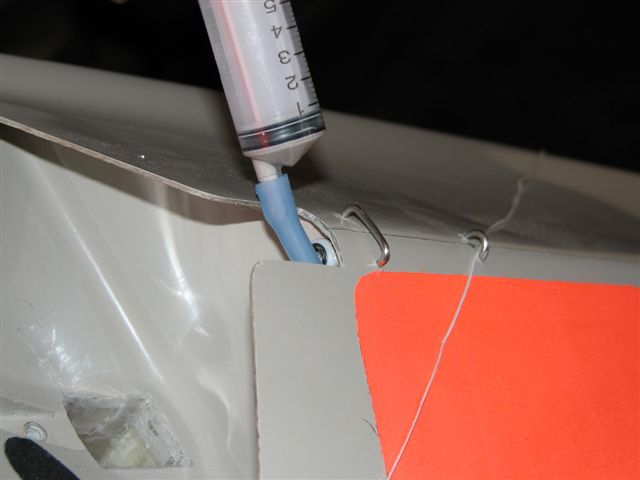
To finish glueing and filling around the bulkhead and deck area, I coloured the resin with matching gelcoat pigment (add pigment by about 5% of total volume of mix) and added some filler powder to get a thick syrup consistency. Then using a syringe and length of tubing, I ran a bead of resin around the edges to make everything watertight and neat.
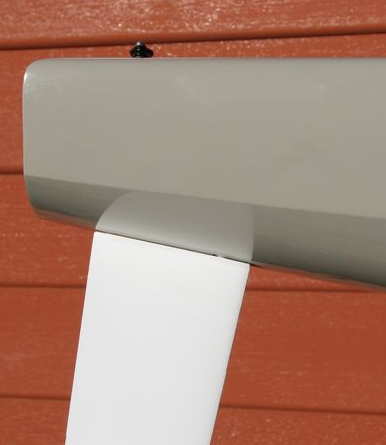
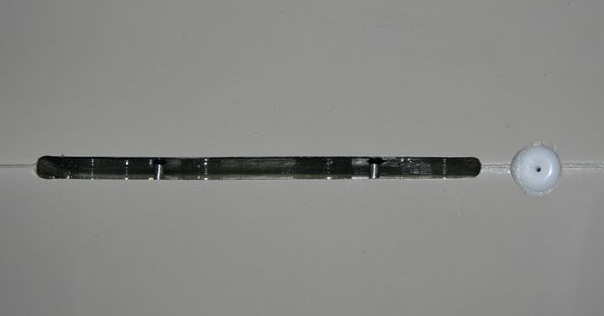
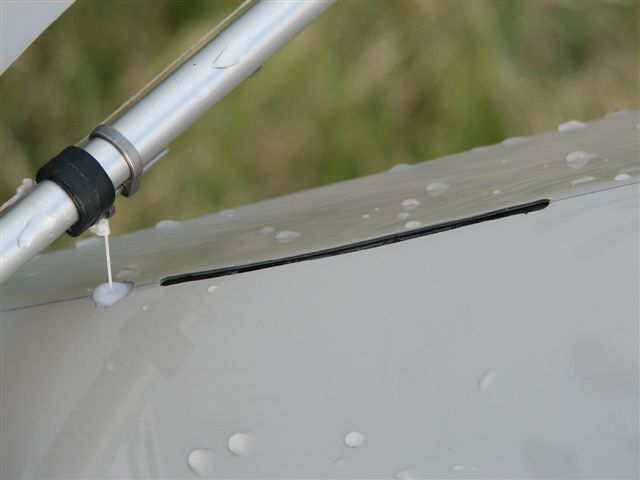
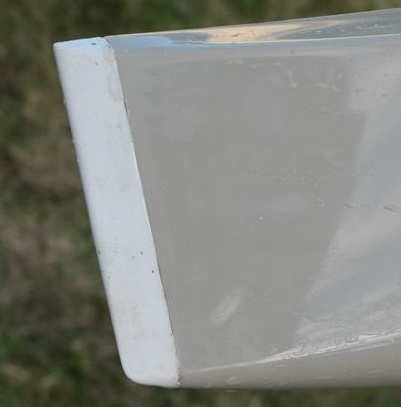
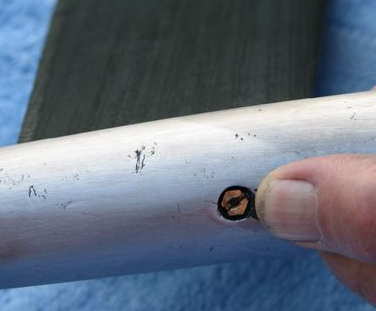
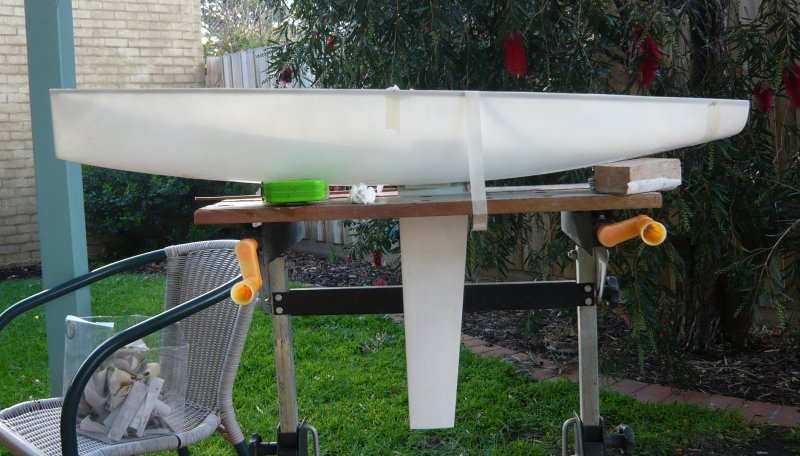
The bow bumper is attached using white silicon, and the keel parts are prepared for joining. Great care has to be taken to get maximum draft, without exceeding it, whilst getting the geometry of the bulb correct. Generally the bulb is set about 88 degrees to the vertical, meaning it is tipped up about 2 degrees from the waterline of the boat. Depending on the shape of the bulb, this can affect the position of maximum draft of the boat. The pencil mark on the bulb is its centre of gravity, and the bulb must be positioned on the fin so it is in balance with the hull, otherwise you will end up with your boat being bow down or up, and you will have to move your internal ballast to compensate - not desirable. I used other boats and technical information available, to ascertain the theoretical ideal position. If you get it wrong you may have to refit the bulb, so do not paint the bulb and fin until you have had your boat measured and floated, in case you have to do some tweeking.
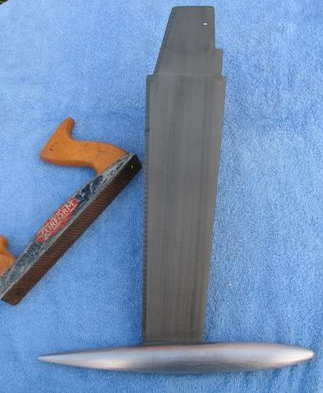
I used a fin insert to attach the bulb, which gives me scope for adjustment. After attaching, I used little strips of lead as spacers under the fin to achieve the right angle of attack of the bulb and the maximum draft. At the same time you have to ensure the fin is in perfect alignment with the bulb along its length (when viewed from above) and that it is perpendicular to the bulb when viewed from in front. Before doing this, I applied release wax to the bottom of the fin, so after the filler has cured you can pull the fin back out of the bulb. When I was happy that everything was just right, I put filler into the slot around the fin to set it in its final position - hopefully Once it was assembled, I used a Surform tool to remove the excess weight of the bulb - If you don't own a surform tool, I have heard that some cheese graters will suffice!!!! Sand the carbon fin until you have achieved a very fine finish - either raw carbon or after you have painted it, making sure you achieve a sharp trailing edge. After you have reduced the weight to about 2508 grams with the Surform, use a heavy grade sand paper to remove the scratches then finer grades until the complete bulb and fin (without the attachment bolt) is at the target weight of 2496 grams. Or a bit less, if you are going to use filler and paint for the final finish.
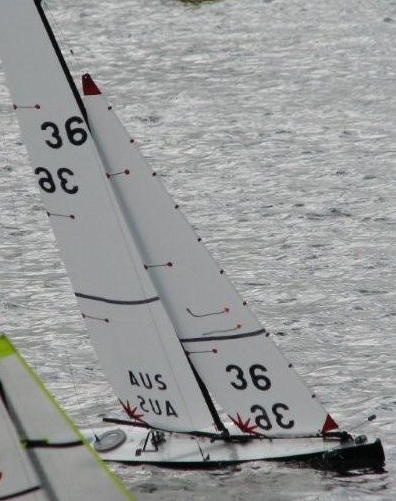
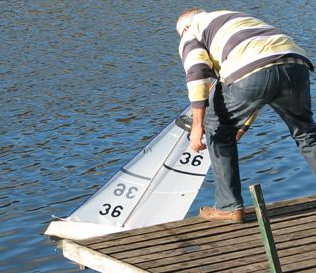
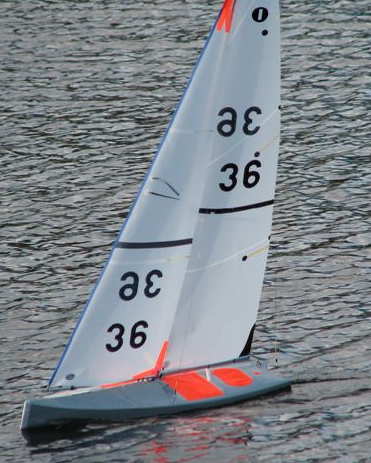
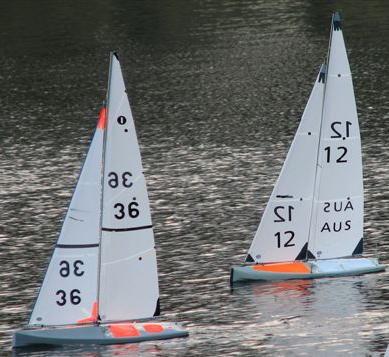
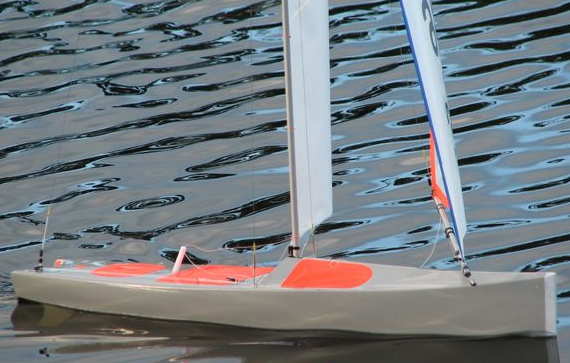
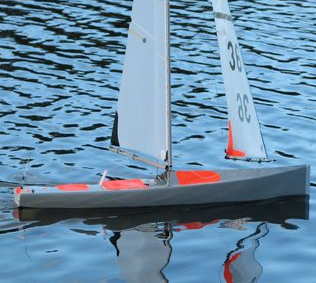
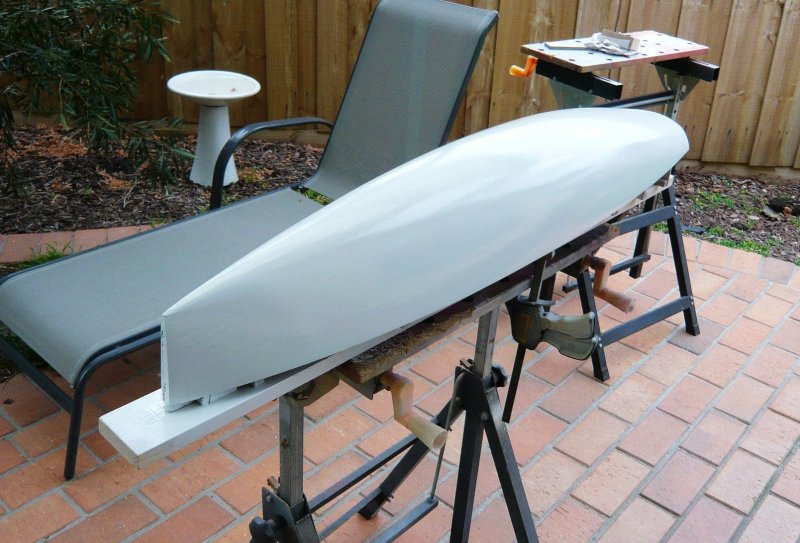
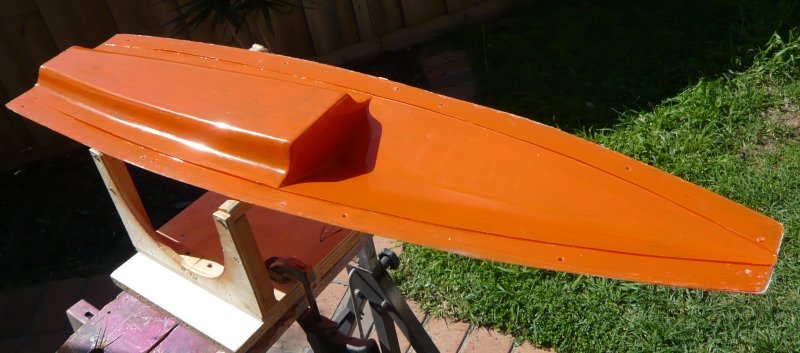
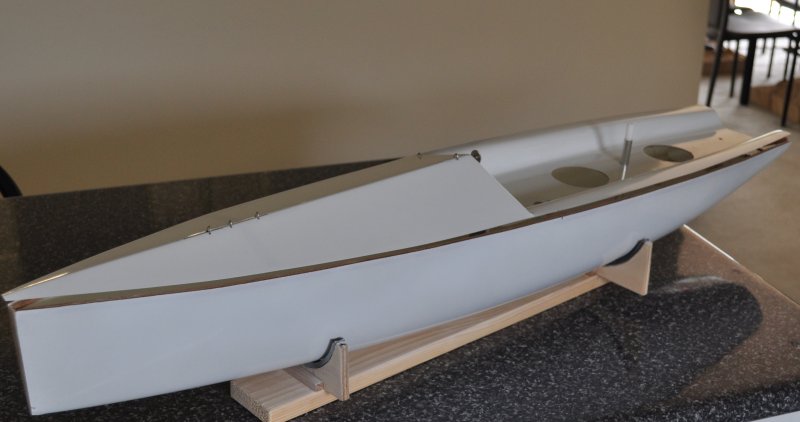
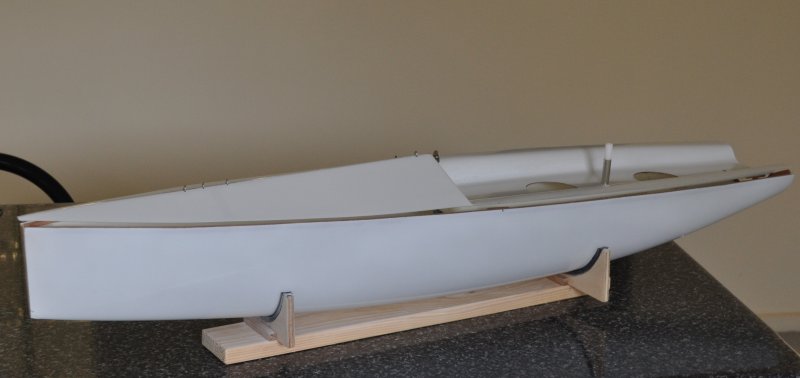
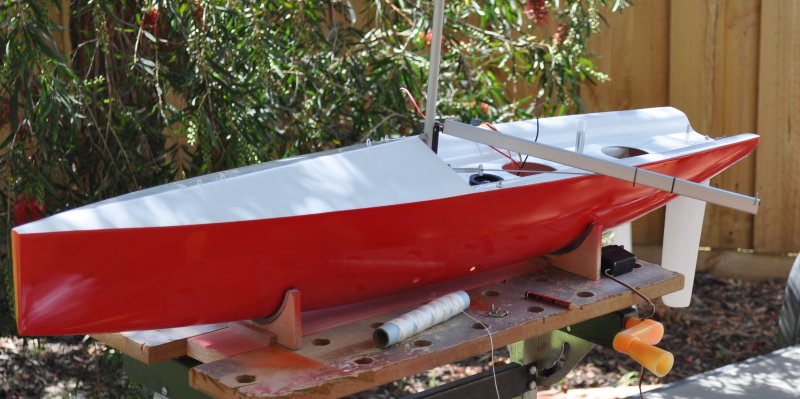
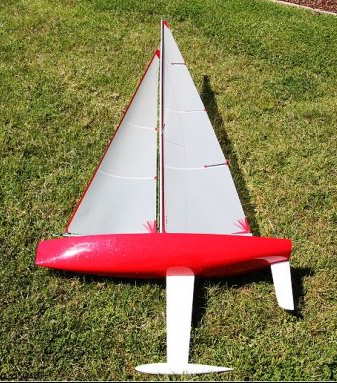
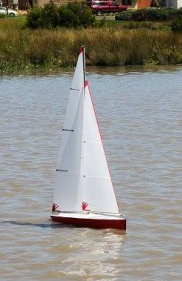
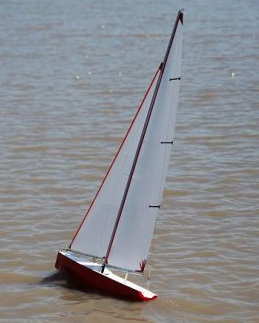
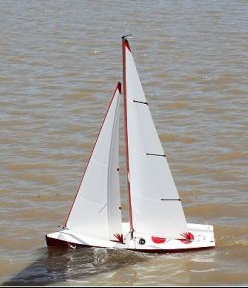
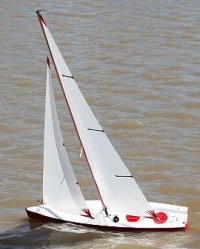
May 15th 2010 - With the winch and electrics installed, I built the rigs and fitted the sails, (see our Building a Rig page) and after making sure the boat was on weight, I visited some friends who were having a sail day at a local winery and launched my Pikanto for its first test sail. Either through some good luck or good management, I was delighted to see the boat float almost perfectly on its lines. The ideal waterline for the Pikanto and most boats, is to have the front half of the bow bumper just clear of the water and the deepest part of the stern/transom just touching the water. So after a lot of hard graft, it is a good feeling to be on the water. It is now time for fine tuning and getting the boat measured....................
Building Notes: I built Cassies Italico some years ago without a Dremmel rotary tool (or similar), and whilst doing this current build, I was not sure how I managed without one. I think they are the most essential tool to have before commencing a build. Make sure you have a good range of cutting, grinding, and sanding attachments, as you will be using this tool for most of the tasks. I have a cordless model, which I think is the best way to go, due to its portability. I also have a drill press accessory, that the Dremmel fits into, and although it is a bit of a "toy", it has been an excellent investment, especially when building the rigs. A good workshop space is essential (or an understanding partner, if you do it on the kitchen benches like I mostly did with this build). Have your tools and parts grouped in small cardboard boxes, to keep everything organised - eg I had my resins, filler powders, glass cloth, acetone. rags, mixing and measuring cups and sticks etc all on one tray, so when it was time for a glassing or filling job, everything required is at hand. A good range of files, pliers, cutters, knives, drill bits, tapes, small clamps, measuring tape, ruler, spirit level,string, wire etc should be assembled, and a good vice and portable workbench are also essential. Also have a cradle made (a styrene box works well) to hold the boat while working on it. As mentioned previously, it is a good idea to cover the hull with cling wrap or similar, to protect it from resin finger marks Have latex gloves and a good mask available, as the dust is toxic, and where possible do your cutting outside with your portable workbench (the type that has a 2 part top that can be screwed in and out to act as a cramp/vice) I also found that having Cassie to hold the boat when doing awkward jobs or when gluing & cutting etc. or to help with measurements, lining things up, finding lost tools, etc. was invaluable throughout the build. Don't underestimate the time and precision work that will be required, but this is offset by the pleasure and satisfaction of doing your own construction. It may also make you appreciate and value the work that the professional boat builders and sailmakers in our sport, put into our boats, rigs & sails. Happy Building and Sailing to All - Denis & Cassie
Interesting detailed photos of Rig and Hull of a Pikanto - Click Here
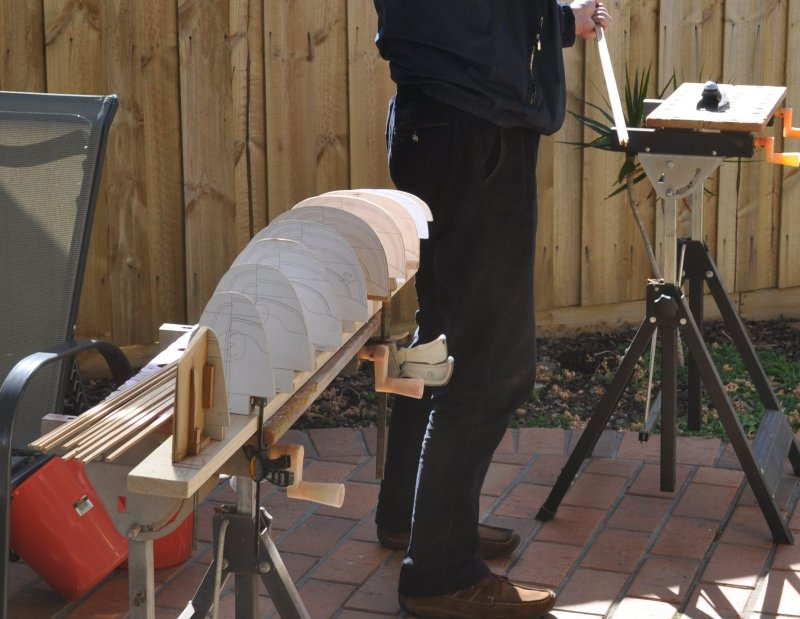
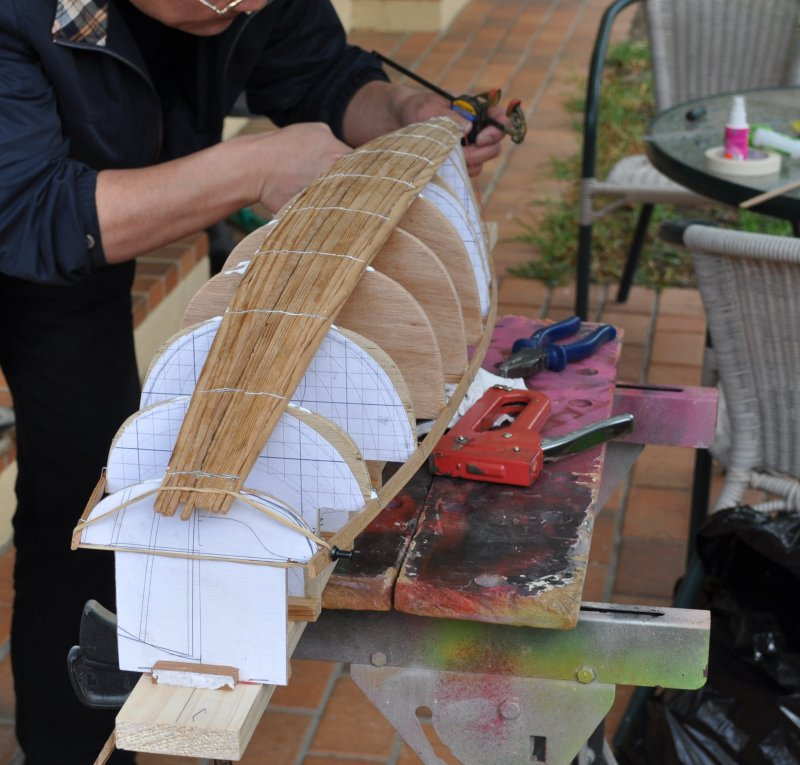
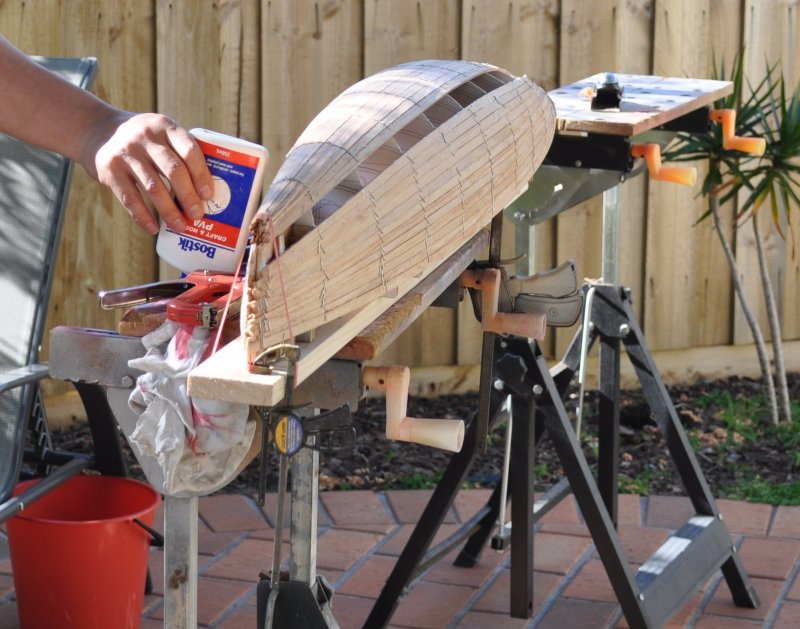
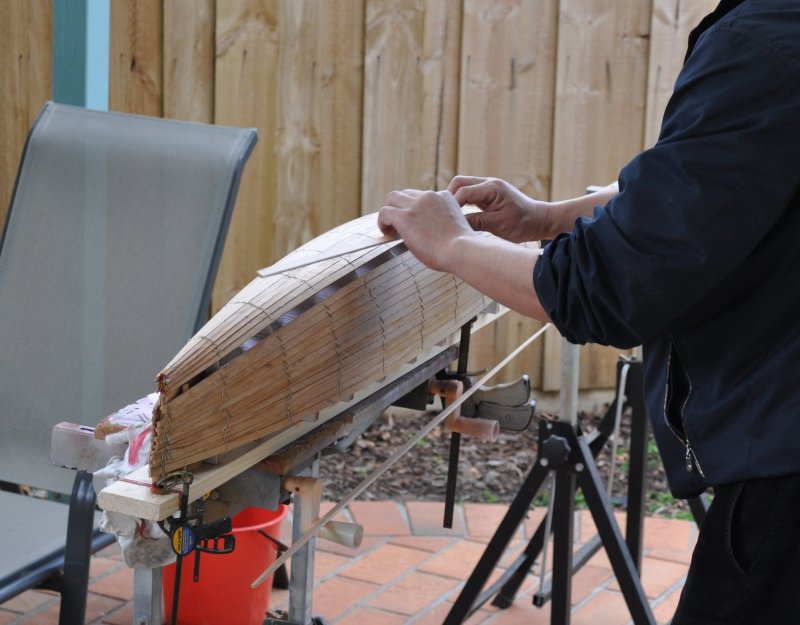
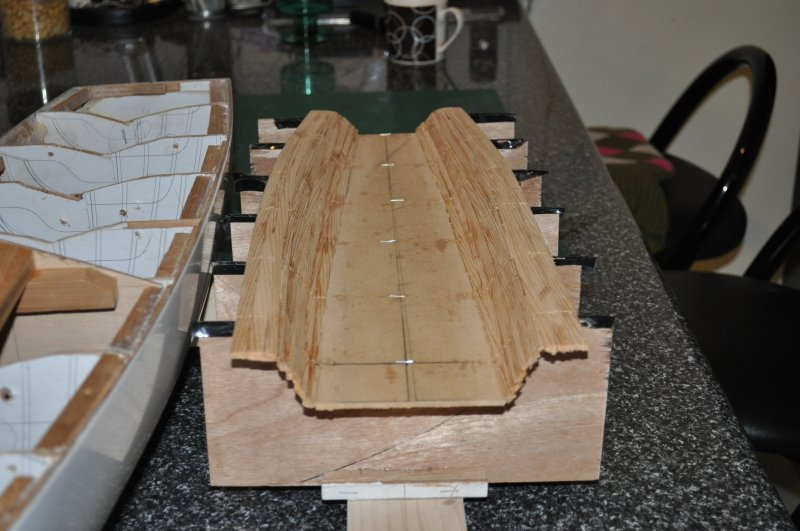
Building a Noux in Bills Backyard This project commenced on 1st September 2009 We dropped into visit our old friend Bill Hutch recently, and found him busy with his mate Roger who has recently moved to Australia from Shanghai. They were busy building a Noux design IOM radio controlled yacht, from plans that Roger had downloaded from Anders Wallin's website for free (see our links page or FREE Boat Plans page). After lofting the plans and cutting out the frames (being careful to remove the thickness of planking they would use to plank the mould). They mounted the frames on a base board, and using western red cedar lining boards, they ripped the material down to thin strips on a circular saw. 40 strips were carefully stapled on the frames and a generous coating of filler was applied. After many hours of sanding and fairing, the plug was ready for its final coat of paint, in readiness for a fibreglass mould to be made, into which the hull will be laid up.........
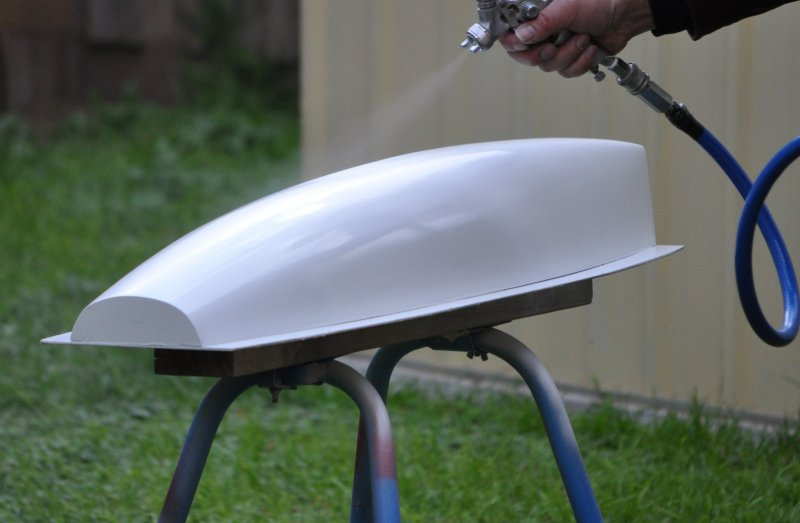
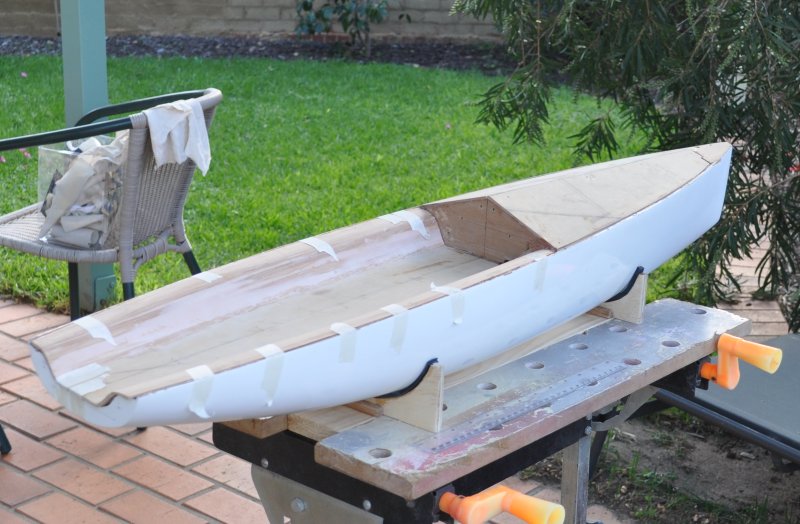
Above : Plug and flange painting, followed by final sand, polish and lots of waxing, prior to gel coat and laying up the mould. Plug is ready for removal from building board. Flange is then attached and the mould is laid up in thick fibreglass over the plug - below left: Mould finished and curing - below right: Plug ready to remove from Mould
Below - Finished Mould with Flanges Trimmed
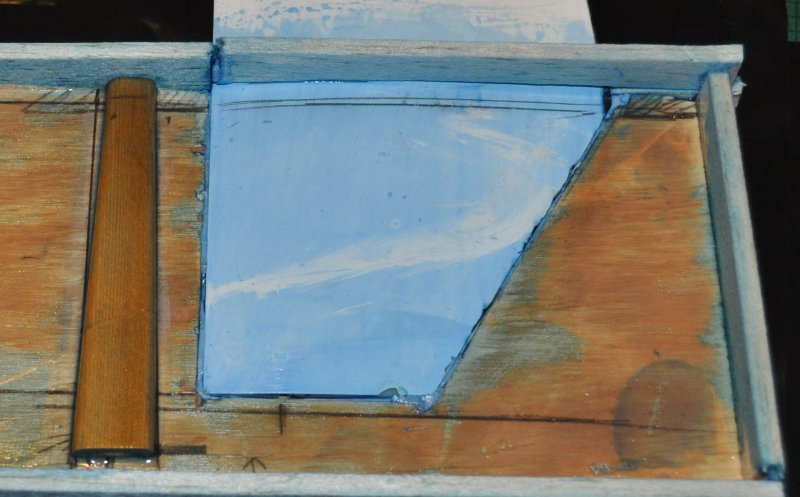
Below -Preparing to make Fin Box and creating Deck/Cockpit Mould
14th Sept 2009 - It is now 2 weeks into the build and all the hard work is starting to show results. Bill & Roger have finished the deck plug in timber and are ready to make the deck mould, which will be used to lay up the deck.
Lookin' Good To think this was a cedar lining board and a pot of bog 2 weeks ago This is just the plug, now its time to make a boat........
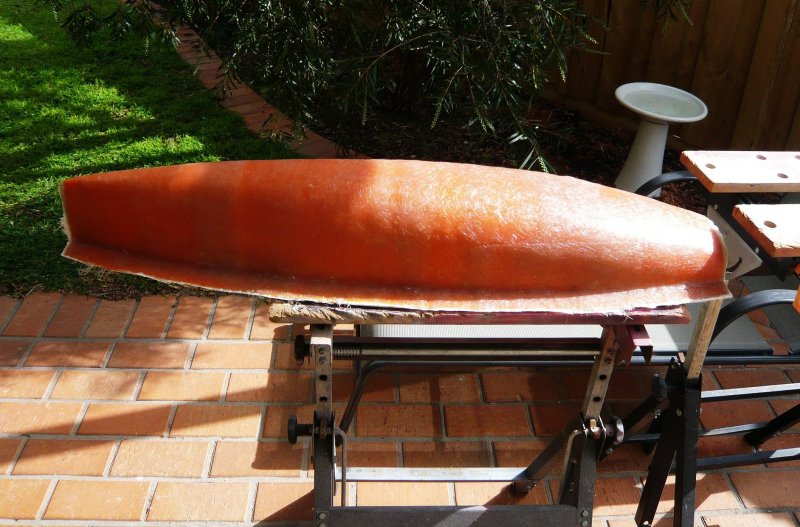
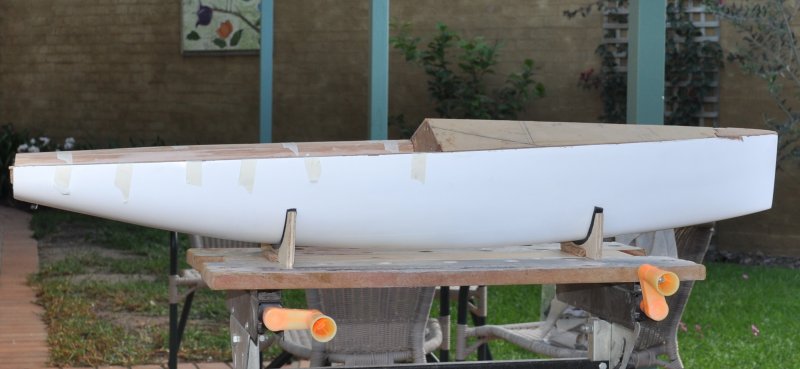
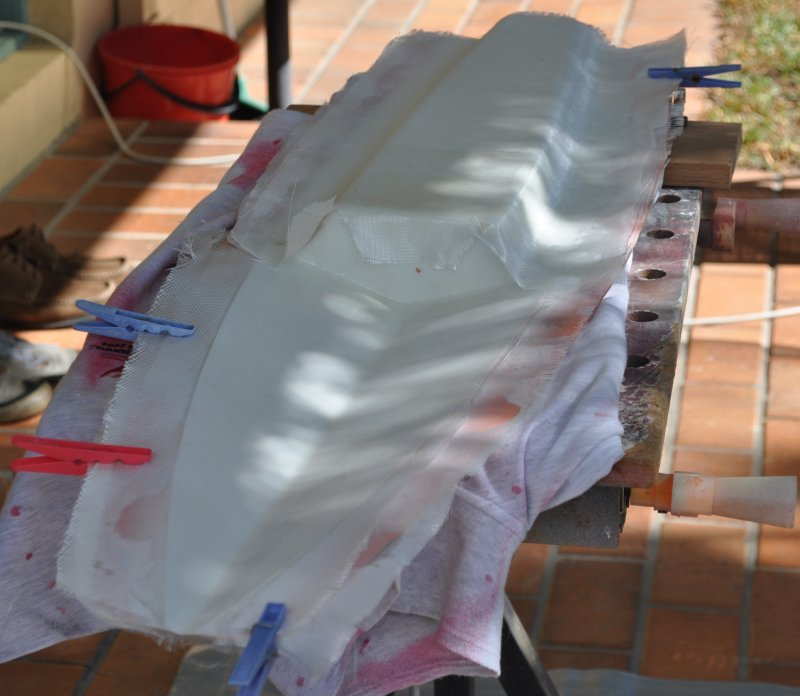
16th September 2009 - Roger goes to work, laying up the fibreglass in the mould, being careful to get a good impregnation of resin whilst keeping weight to the minimum. A few hours later..............
Voilà..... A boat is born!
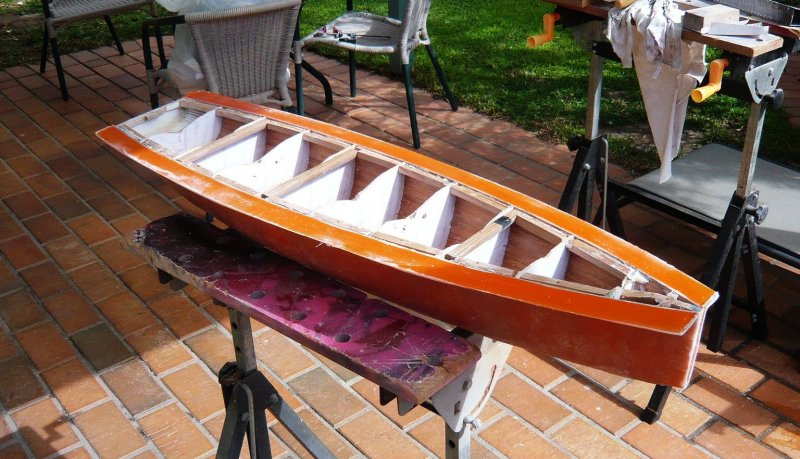
18th September 2009 Rain swept over Bills Boatyard, slowing production, and delaying the deck mould. The deck plug has had its final wet sand and been polished and waxed in readiness for the deck mould to be made. But the boys managed a few little jobs like gluing the inwhales in place.
21st September - Bill reports:
Hull with inwales weighs 280gm. Maybe a bit heavy but all up should be underweight. Very stiff. Deck mould made today. Popped it, clean and jerk. No stickers in our boat yard. Wax on, wax off, just repeat a few times.
22nd September 2009 The Deck Mould Layup is completed over the plug and trimmed
The completed Deck Mould
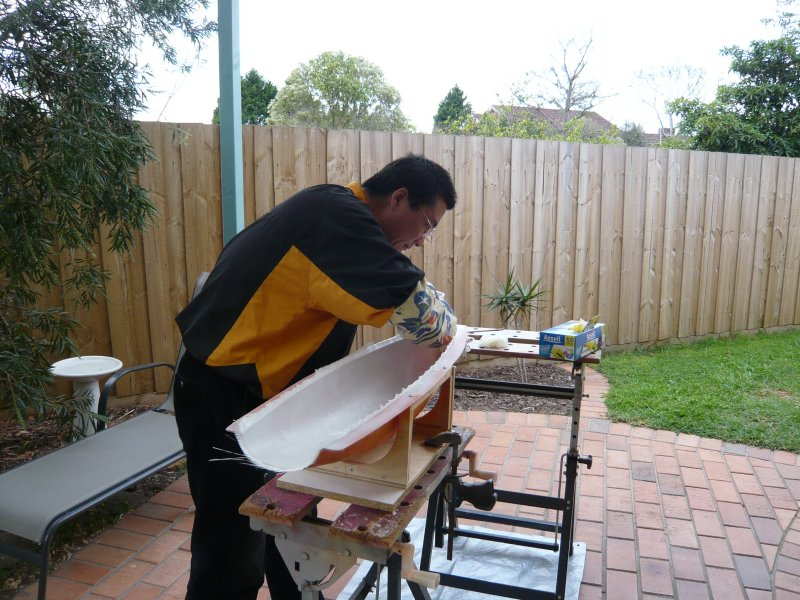
23rd Sept 2009 - The fibreglass is laid up over the mould and some reinforcing added under the deck
24th Sept 2009 - Whilst the deck is curing, the fin is fitted and aligned into the boat, using a custom made fin box and mast tube. It is important when building model yachts that the fin is installed perfectly aligned, or performance will suffer.
25th Sept 2009 - Completed Deck almost ready to be glued to hull -
Time to start building the rig and send Bill to the Sail Loft........
1st October 2009 The boys have had a busy week, preparing the hull before joining the deck and then epoxy undercoating finished hull below...
A squirt of 2 part epoxy gloss, with very fast hardener and thinners. Great for out door spraying use. Touch dry in 30 seconds, no bugs.
8th October 2009 The Rudder, Winch and Deck Fittings are now fitted. Rig almost complete Today Bill and Roger did all the running and standing rigging, winch setup, rudder linkage etc. Lots more little things to do, maybe first sail next Tuesday??? All up weight with A rig = 265gm under. Plenty of scope to trim the boat just right. This really is a good looking model sail boat.
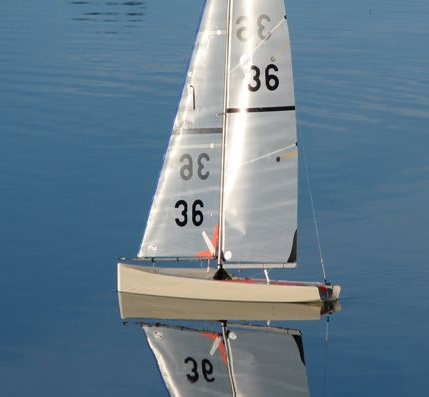
15th Oct to 25th Oct 2009 - Roger and Bill spent a week finishing all the little details and Bill made a set of sails. After fitting them and testing the systems it was down to the lake for the launching......................
Looking Good
Go you good thing....
Radio Sailing Shop wish to thank Roger and Bill for sharing their project with us, and choosing us to supply the A & B Rigs, Winch, and Fin for the Noux - Happy Sailing Roger
For Links to FREE Plans for the NOUX and other IOM designs see our FREE PLANS Page
|